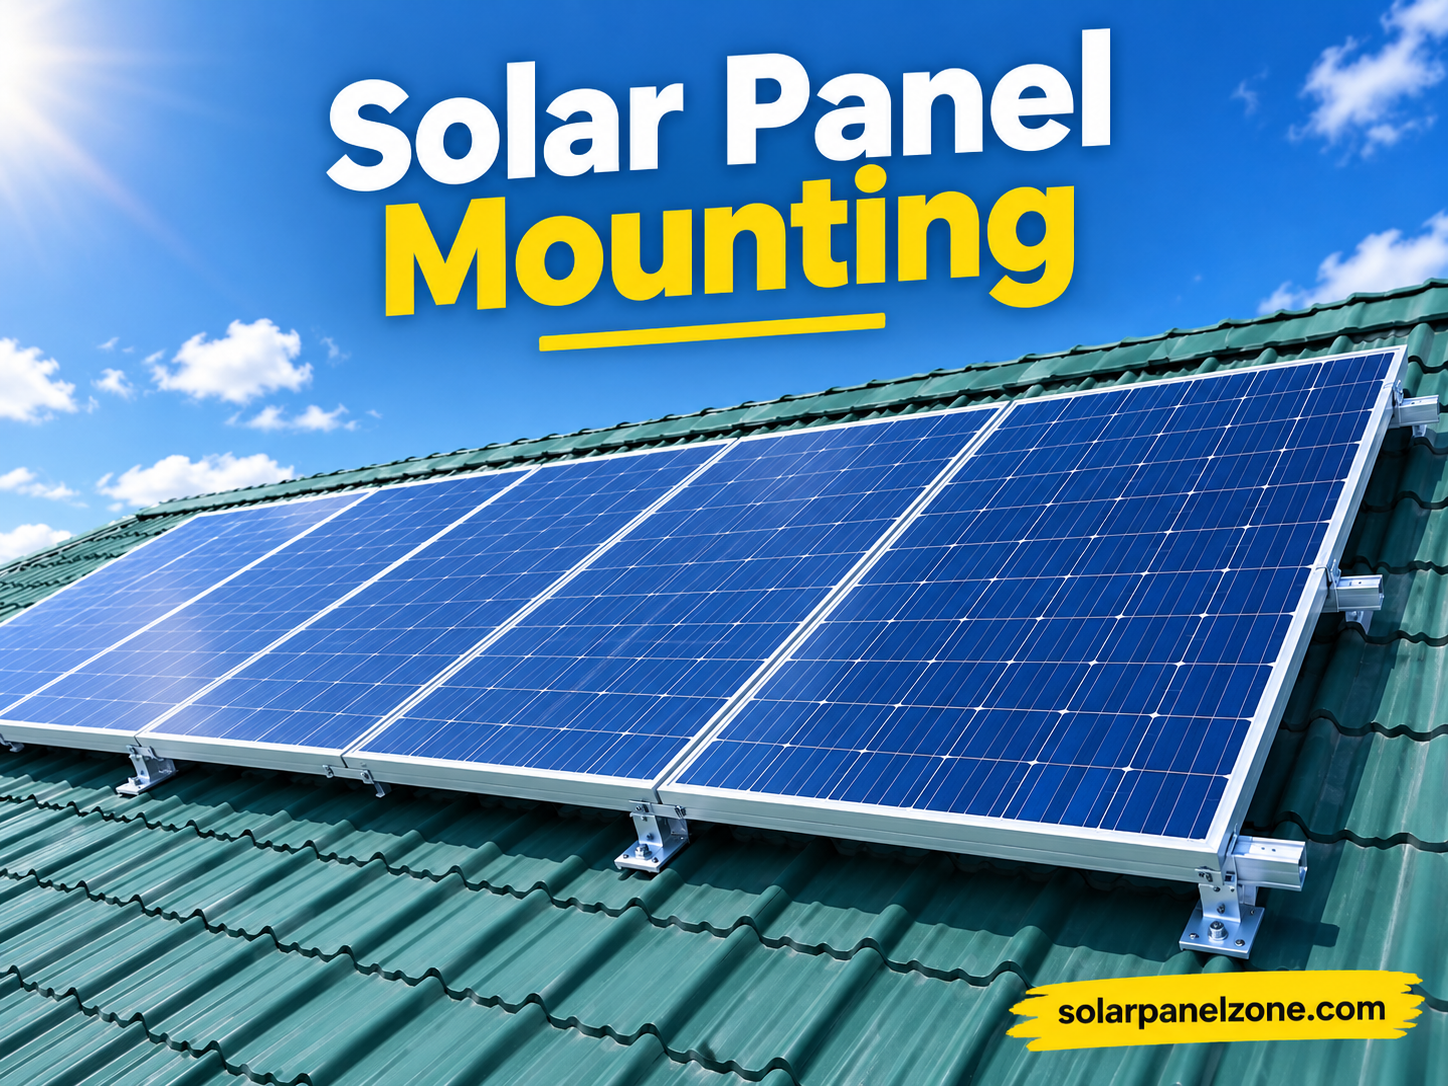
What Is a Solar Panel Mounting System?
A solar panel mounting system, also called solar racking, is the structure that holds Solar Panel Mounting in place on a roof or on the ground. It sets the tilt angle, resists wind and snow, and protects the building where the array attaches.
Most systems combine a few repeating parts:
- Rails that run across the roof or frame
- Module clamps (mid and end clamps) that grip each Solar Panel Mounting
- L-feet, hooks or standoffs that connect rails to rafters, purlins or the roof deck
- Flashing that seals each roof penetration
- Footings such as concrete piers, ground screws or driven piles on ground systems
The mount rarely gets attention in a quote, but it decides whether the array is still tight, watertight and compliant in year 15. Industry guides put mounts and racking at roughly 10% of total system cost (SolarReviews), which makes them a small line item with outsized consequences.
Why the Solar Panel Mounting Matters More Than Most Buyers Expect
The mount does four jobs: it keeps Solar Panel Mounting attached in high wind, holds the right tilt and azimuth, keeps water out of the roof, and keeps your warranty and permit valid.
That last point catches people out. Permit offices usually want structural and layout documentation, and incomplete paperwork can lead to rejection or failed inspection. Panel and racking manufacturers also set installation requirements, and a mount that ignores them can leave you without coverage when something goes wrong.
If you are comparing quotes, ask for the racking brand, model and fastener specification in writing. A vague line like “standard mounting included” is a warning sign.
The Main Types of Solar Panel Mountin Systems
The three main types are roof-mounted, ground-mounted and pole-Solar Panel Mounting systems. Roof Solar Panel Mounting are the most common for homes and small commercial buildings. Ground and pole Solar Panel Mounting suit open land, farms and sites where roofs are weak, shaded or unavailable.
Roof-mounted systems
Roof mounts attach Solar Panel Mounting to the building itself. They use the least land and usually cost less than ground systems.
Flush (rail and hook) mounts on sloped roofs
Solar Panel Mounting sit parallel to the roof, a few inches above it. Hooks, L-feet or standoffs fasten into rafters, with flashing sealing each penetration. This is the classic roof-penetrating rack, and for most pitched residential roofs it is the default choice.
Not ideal when: the roof is near the end of its life, the framing is weak, or orientation and pitch are poor for production.
Tilted Solar Panel Mounting on flat roofs
Triangular frames raise Solar Panel Mounting to a better angle. They are common on concrete roofs and commercial flat roofs. The trade-off is wind exposure and row spacing: tilted rows can shade each other if packed too tightly.
Ballasted (non-penetrating) Solar Panel Mounting
Ballasted racking uses weight, usually concrete blocks, instead of anchors. It is popular on flat commercial roofs where drilling risks the waterproofing membrane.
Warning: ballast adds significant dead load. A structural check is essential before choosing this option, and wind design still applies.
Rail-less and special roof options
Rail-less systems attach Solar Panel Mounting directly to brackets or the roof, cutting material. Standing-seam metal roofs often accept clamp-on Solar Panel Mountin that avoid penetrations. Always confirm compatibility with the roof profile and manufacturer instructions.
Ground-mounted systems
Ground Solar Panel Mounting place a steel or aluminum frame on land. They allow ideal tilt, easy cleaning and simple expansion.
- Fixed-tilt ground mounts hold one angle all year and are the usual choice.
- Adjustable mounts let you change tilt seasonally.
- Single-axis trackers rotate panels to follow the sun and raise output, but they add cost, moving parts and maintenance.
Not ideal when: space is tight, soil is poor without extra foundation work, or the budget is lean. Ground systems typically cost more than roof systems because of added materials, trenching and labor.
Pole-mounted systems
Pole Solar Panel Mounting raise one array or a small group on a central post. They suit farms, remote sites and small off-grid setups. Larger arrays usually favor other ground structures.
Other variants
- Carport and canopy structures combine shade, parking and generation, at higher steel cost.
- BIPV (building-integrated photovoltaics) replaces roofing materials with Solar Panel Mounting elements. It looks cleaner but is a premium, specialist option.
Roof Mount vs Ground Solar Panel Mounting vs Pole Mount: Comparison
| Factor | Roof (flush/hook) | Roof (flat, tilted or ballasted) | Ground mount | Pole mount |
|---|---|---|---|---|
| Typical cost | Lowest | Low to medium | Medium to high | Medium |
| Best for | Pitched residential roofs | Commercial and flat roofs | Open land, farms, large loads | Small arrays, remote sites |
| Roof penetration | Yes, sealed with flashing | Yes (anchored) or no (ballasted) | None | None |
| Wind exposure | Low profile, lower risk | Higher; needs engineered anchoring or ballast | Engineered foundation | Single-post loading |
| Corrosion concern | Fasteners and flashing | Fasteners, steel frames | Steel in soil and humid air | Post base and steel |
| Code and approvals | Structural and electrical permit | Structural check for load and wind | Land use, foundation and electrical | Foundation and electrical |
| Cleaning access | Harder (roof access) | Moderate | Easy | Easy |
| Watch out for | Leaks, old roofs | Roof overload, shading between rows | Cost, land, soil | Capacity limits |
The right choice is rarely about the mount in isolation. It follows from your roof, your land, your climate and your budget.
Materials and Fasteners: Where Durability Is Won or Lost
Anodized aluminum and hot-dip galvanized steel are the standard structure materials, with stainless-steel fasteners for corrosion resistance. The main risks are coating failure and mixing dissimilar metals.
- Anodized aluminum is lightweight and corrosion resistant, common for rails and clamps.
- Hot-dip galvanized steel is strong and economical for ground frames and heavy structures.
- Stainless fasteners (A2 or A4 grades) are preferred where humidity or salt air is a factor.
Coastal sites, humid climates and industrial areas punish cheap coatings. Contact between dissimilar metals can start galvanic corrosion, so look for isolation washers or compatible pairings. Desert sites add dust and abrasion, and snowy regions add heavy, sustained loads.
When reviewing a quote, check the fastener grade, coating thickness and manufacturer warranty on the structure itself.
Wind, Snow and Structural Checks
Before any mount is chosen, the roof or ground needs a structural check. Wind uplift, snow load and the weight of the array must all stay within what the structure can carry, using local engineering rules.
A practical pre-check covers:
- Roof age and condition. Re-roof first if it will not last the system’s life.
- Framing. Rafter or purlin size, spacing and condition.
- Load path. Where the fasteners land, and what they bite into.
- Local load data. Wind speed zone, snow load and exposure category.
- Roof type. Tile, shingle, metal, membrane or concrete each need different hardware.
For flat-roof ballasted systems, the load question is the deciding one: does the roof carry the added weight safely, including under wind?
Tilt Angle and Orientation
A common starting rule is to tilt panels roughly at your latitude and face them toward the equator (south in the Northern Hemisphere, north in the Southern). Real designs adjust for roof pitch, seasonal goals, shading and row spacing.
- Steeper tilts favor winter output and shed snow and dust.
- Shallower tilts favor summer output and reduce wind load.
- On flat roofs, lower tilts often win because they reduce wind load and row-to-row shading.
If your roof already faces roughly the right direction, a flush Solar Panel Mounting often beats a tilted frame on cost and simplicity, even at a slightly imperfect angle.
Codes, Standards and Permits Around the World
Regional rules differ, so confirm what applies locally. The table lists common reference points that installers and inspectors work from.
| Region | Common references |
|---|---|
| United States | NEC for electrical, IBC and ASCE 7 for structural and wind loads, UL 2703 for mounting and bonding; installer credentials such as NABCEP |
| United Kingdom | MCS certification for installers and products, plus building regulations |
| European Union | Eurocodes for structural design, plus national electrical rules |
| Australia | AS/NZS 5033 for PV arrays, with Clean Energy Council (CEC) accredited installers |
| Pakistan | NEPRA and AEDB frameworks for grid connection and approved installers |
| International | IEC 61215 and 61730 for panels, IEC 62548 for PV array design |
This list is a map, not legal advice. Local authorities set the final requirements, and they update them.
A good installer prepares the permit package as part of the job: site plan, layout, structural information, equipment data sheets and electrical diagrams. Ask early what the local authority needs, and who submits it.
How Installation Works: Step by Step
- Assess the site. Check roof or land, shading, orientation, access and any local restrictions.
- Confirm the structure. Verify framing, load capacity or soil conditions.
- Design the layout. Fix panel count, row spacing, tilt, rail positions and attachment points.
- Submit permits and utility paperwork. Do not start without approval where required.
- Install anchors or foundations. Locate rafters, drill pilot holes, set flashing or place footings.
- Seal the penetrations. Flashing and sealant must match the roof material.
- Fit the rails or frames. Align, level and torque to specification.
- Clamp the panels. Use mid and end clamps in the correct positions, observing the panel manufacturer’s clamping zones.
- Bond and ground the array. Follow the applicable electrical code.
- Run wiring and connect the inverter. Protect cables from edges and sun.
- Test and commission. Check voltage, polarity and inverter settings.
- Inspect and hand over. Receive documents, warranties and monitoring access.
Work at height and live electrical connections are hazardous. Fall protection, isolation procedures and trained personnel are not optional.
What Solar Panel Mounting Solar Costs
Solar Panel Mounting and racking typically make up about 10% of total system cost, according to Solar Panel Mounting Reviews. Ground systems usually cost more than roof systems, while ballasted and tilted designs vary with roof conditions and engineering.
Cost drivers include:
- Solar Panel Mounting type and complexity
- Roof material and access
- Structure material and coatings
- Wind and snow design requirements
- Foundations (concrete, ground screws, piles)
- Labor and permitting
- Local currency, tariffs and supply conditions
Prices differ widely between countries and over time, so use local quotes rather than a single global figure. Ask installers for the racking cost broken out per kW or per panel, and compare like for like.
Pros and Cons by Solar Panel Mounting Type
Roof Solar Panel Mounting mounts
- Pros: use existing structure, lower cost, little land, quicker install
- Cons: roof penetrations, harder cleaning, limited by roof shape and condition
Ground Solar Panel Mounting
- Pros: ideal tilt, easy cleaning, no roof risk, easy to expand
- Cons: higher cost, needs land, foundation and trenching work
Pole mounts
- Pros: small footprint, good for remote sites, simple to adjust
- Cons: limited capacity, single-post loading
Trackers
- Pros: higher energy per panel in suitable sites
- Cons: more cost, moving parts, more maintenance
How to Choose: A Simple Decision Path
Start with the surface, then add goals, climate and budget.
- What do you have?
- Sound pitched roof: flush rail-and-hook
- Flat commercial roof: tilted or ballasted, after a structural check
- Weak roof or spare land: ground Solar Panel Mounting
- Small remote load: pole Solar Panel Mounting
- What is the climate? High wind needs engineered anchoring or extra ballast. Coastal air needs stainless fasteners and quality coatings. Snow needs load-rated structures.
- Who are you? Homeowners usually prioritize cost, roof safety and appearance. Commercial and industrial buyers add load analysis, maintenance access and expansion.
- What is the budget logic? Compare lifetime cost, not just upfront price.
Scenario: A homeowner with a 12-year-old shingle roof gets two quotes. One includes a cheap rack on the old roof. The better plan replaces the roof first and uses flashed hook mounts. It costs more today and avoids removing and reinstalling the array in a few years.
Choosing an Installer and Protecting Your Warranty
A strong installer shows you drawings, names specific products, explains how penetrations are sealed and documents the structural check. Weak ones quote a price and a panel brand and say little else.
Useful checks:
- Credentials: NABCEP (US), MCS (UK), CEC accreditation (Australia), or the equivalent in your country, plus local electrical licensing
- Similar projects: especially the same roof type or mount type
- Written specs: racking brand, model, fastener grade and attachment spacing
- Warranty paperwork: who covers workmanship, roof penetrations and the structure
- Permit handling: who prepares and submits
- Service coverage: whether they serve your area and respond to problems
For B2B buyers sourcing racking directly, add supplier checks: certification to relevant standards, available engineering support, lead times and warranty terms.
Keep the quote, the data sheets, the permit approval and the commissioning report together. If a warranty claim comes up, that file settles the argument.
Mistakes to Avoid
- Mounting on a roof that needs replacing soon
- Skipping the structural or wind-load check
- Ballasting without confirming roof capacity
- Using mismatched metals or low-grade fasteners
- Ignoring shading from vents, parapets or neighboring buildings
- Accepting quotes without racking details
- Starting before permit approval
- DIY work at height or on live circuits without training
Checklists
Homeowner pre-install checklist
- Roof age and condition confirmed
- Roof type and framing identified
- Shading assessed across seasons
- Three itemized quotes collected
- Racking brand and model named in writing
- Permit and utility process explained
- Warranty terms for workmanship and penetrations received
Installer and commercial checklist
- Structural engineer’s sign-off or load calculation
- Wind and snow design basis documented
- Mount compatibility with roof membrane or profile verified
- Fastener and coating specifications recorded
- Grounding and bonding plan prepared
- Fall protection and isolation procedures in place
- Handover documents and maintenance schedule delivered
Maintenance and Inspection
Check Solar Panel Mounting once a year and after severe weather. Look for loose clamps, shifted rails, lifted flashing, corrosion at fasteners and signs of roof leaks inside the building.
Clean Solar Panel Mounting as needed for your climate, using soft tools and safe access. In dusty, coastal or heavily polluted areas, plan more frequent inspections.
Alternatives to Consider
- Solar leases or power purchase agreements, where the provider owns and maintains the system
- Community solar, for people who cannot install on their own property
- Carports or canopies, for sites with parking and limited roof space
- BIPV, where the roofing and the solar are one product
- Efficiency upgrades first, which shrink the system you need
Frequently Asked Questions
Which solar panel mount is best?
For most homes with a sound pitched roof, a flush rail-and-hook mount is the best balance of cost and simplicity. Flat commercial roofs often suit tilted or ballasted systems, and open land suits ground mounts.
Do solar mounts damage the roof?
Not when installed correctly. Penetrating Solar Panel Mounting rely on proper flashing and sealing, and installer workmanship is the main risk. Ballasted and clamp-on options avoid penetrations but have their own load and compatibility checks.
Can solar panels be installed on any roof?
No. Roof age, material, framing, shading and orientation all matter. Some roofs need repairs, reinforcement or a different mount type first.
How long does a solar installation take?
On-site work for a typical home system is often a few days. Permits, utility approval and equipment delivery can add weeks or more, depending on the region.
Do I need a permit for solar panel mounting?
In most places, yes. Structural and electrical permits are common, and utility connection approval is often separate. Check with your local authority and ask your installer who handles the paperwork.
Are ground mounts more expensive than roof mounts?
Usually, yes, because they need extra materials, foundations and labor. They can still make sense where the roof is unsuitable or ideal tilt and easy cleaning are priorities.
What angle should solar panels be set at?
A common starting point is your latitude, facing the equator, then adjusted for roof pitch, shading and seasonal goals. A designer or installer can model options for your site.
What is the difference between ballasted and penetrating mounts?
Ballasted mounts use weight to hold the array in place and avoid drilling into the roof. Penetrating mounts anchor to the structure. Ballast adds load, so it needs a structural check.
Can I install solar panels myself?
Some people mount arrays on their own property, but roof work and electrical connections are hazardous, and many places require licensed electrical work. DIY can also affect permits and warranties.
What materials are best for mounting structures?
Anodized aluminum and hot-dip galvanized steel with stainless fasteners are widely used. Coastal and humid sites benefit most from higher-grade coatings and fasteners.
Conclusion
The best solar mounting system is the one that fits your surface, your climate and your local rules, and is installed by someone who documents the work. Roof mounts suit most homes, ground mounts suit land and weak roofs, and pole mounts fit small or remote setups.
Before you sign anything, confirm the roof or ground can carry the system, get the racking spelled out in writing, and make sure the permit and warranty paperwork is in order. Those few steps cost little and protect an investment designed to last decades.
Unfulfilled Points: Region-specific cost ranges with cited sources and original project photos or case studies were not included, because no verified figures or first-hand material were available; verify codes and costs locally before publishing.
These information about solar panel mounting are gathered from different surveys, medical tests and tech giants like Tom’s Guide and more. Our top priority is to provide you valuable information.
For More Details About Different Solar Panels Click Here