A rticle Body
A 1kW Solar Panel Mount array is small, but the mount underneath it still has to survive years of wind, rain, heat and corrosion. The Solar Panel Mount get the attention. The mount decides whether the system is still in place after the first serious storm.
Short answer: A 1kW solar panel mount is the rack or frame that holds two to four panels at the right angle on a roof, the ground, a pole or a balcony. Pick it by surface, local wind and snow loads, Solar Panel Mount size and certification.
If you searched “1.0k,” this guide reads it as 1kW (1,000 W). Listings labeled 1MW are utility-scale racks, which are a different product.
What a 1kW solar panel mount includes
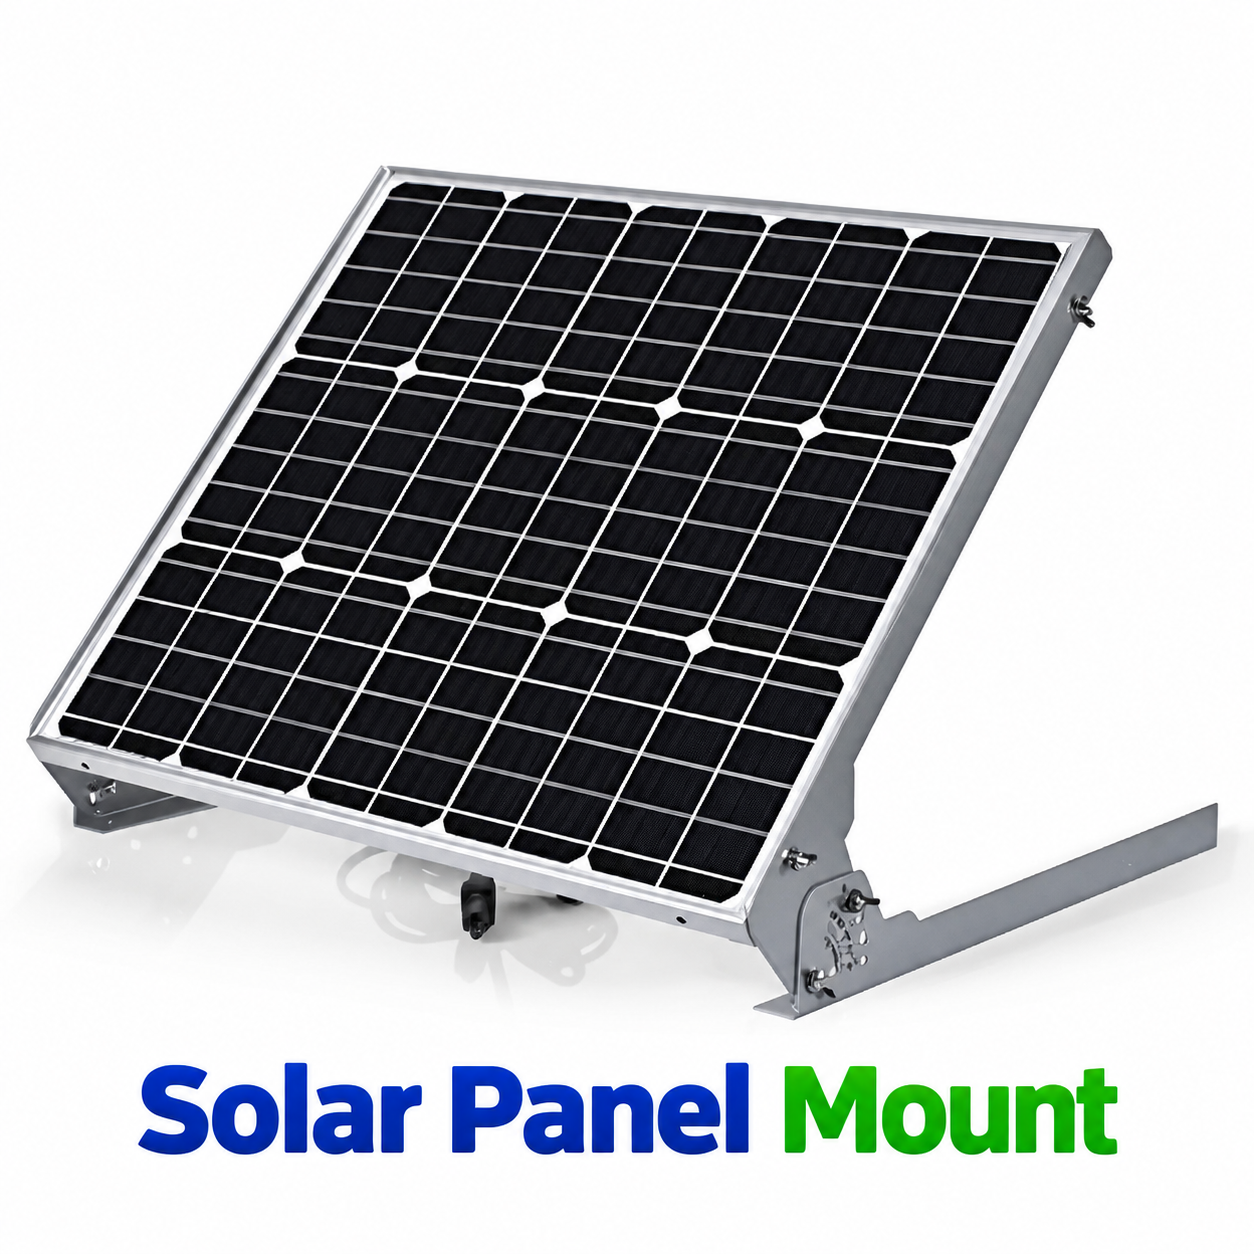
A mounting system is also called racking, a PV mounting structure or a Solar Panel Mount frame. Whatever the name, it does three jobs: it fixes panels to a surface, sets their tilt and direction, and passes wind, snow and weight loads into the roof or ground.
Most rail-based kits contain:
- Rails that run beneath the panels
- Roof hooks, L-feet or standoffs that anchor the rails (ground frames use posts or screws instead)
- Mid clamps and end clamps that grip the Solar Panel Mount frames
- Tilt legs for flat roofs and ground frames
- Flashing at roof penetrations
- Grounding lugs and bonding hardware
- Fasteners, ideally stainless steel
Four terms come up constantly:
- Flashing is a waterproof barrier that seals the spot where a roof anchor passes through the roof.
- Ballast is weight, usually concrete blocks, that holds a frame down without drilling.
- Clamping zone is the section of a Solar Panel Mount frame where the manufacturer permits clamps to grip.
- UL 2703 is the North American safety standard for mounting systems, clamps and grounding devices used with flat-plate PV modules.
How many Solar Panel Mount make 1kW, and why it matters for the Solar Panel Mount
One kilowatt is a total, not a Solar Panel Mount. The number of panels depends on each module’s wattage, and that changes how many clamps, rails and attachment points you need.
| Layout | Total power | End clamps | Mid clamps |
|---|---|---|---|
| 2 × 500 W | 1.0 kW | 4 | 2 |
| 3 × 335–400 W | about 1.0–1.2 kW | 4 | 4 |
| 5 × 200 W (one row) | 1.0 kW | 4 | 8 |
| 10 × 100 W (two rows of five) | 1.0 kW | 8 | 16 |
Clamp counts assume a standard rail-mounted layout with two rails per row of panels. Frameless or rail-less systems differ, so check the manufacturer’s parts list.
Larger modules mean fewer parts and fewer roof penetrations. Smaller modules suit awkward spaces, RVs, boats and ground frames you can lift by hand.
How much space does a 1kW array need?
You will see several different answers online. Three 400 W panels take roughly 55–65 sq ft (about 5–6 m²) of panel area on their own. Supplier and tender documents often say 7–9 m² or 80–100 sq ft.
Both are right because they measure different things. The smaller number is the panel footprint. The larger one adds spacing between modules, setbacks from roof edges, and room for safe access and cable runs.
Planning rule: use the panel footprint to check whether the array fits, then add clearance for the real layout. Shade from tanks, vents, parapet walls or trees cuts output faster than adding another Solar Panel Mount can fix it.
Types of Solar Panel Mount for a 1kW system
Pitched roof Solar Panel Mount
Panels sit parallel to the roof on rails. Hooks or L-feet bolt into rafters, with flashing at each penetration. Tile hooks, shingle standoffs and corrugated-sheet brackets are variations for different roof coverings.
This is the default for most homes because it uses existing space and needs little extra material. The drawback is a fixed angle.
Flat roof frames and ballasted systems
Triangular frames tilt panels toward the sun. On concrete roofs they are usually anchored. Ballasted versions use weight instead of drilling.
Ballast avoids penetrations but adds load, so confirm the roof can carry it. Parapets can shade low-tilt arrays in winter.
Standing seam and tin roofs
On standing seam metal, clamps grip the raised seam with no holes at all. On corrugated or tin roofs, brackets attach to purlins and need careful sealing. Thin sheets and mixed metals are the usual trouble spots.
Ground Solar Panel Mount
Fixed frames sit on concrete footings or ground screws. They suit shaded or weak roofs, farms and anyone who wants easy cleaning and an ideal tilt. Ground racking usually costs more than roof racking because of foundations and longer cable runs, though in some rural cases the total ends up comparable.
Ground arrays also tend to run cooler than rooftop panels. Panel output drops roughly 0.3–0.5% for each degree Celsius above 25°C, so airflow helps.
Pole Solar Panel Mount
A top-of-pole Solar Panel Mount holds two or more panels on a single post set in concrete. One common rule of thumb is to bury the pole to about half its above-ground height, but follow the Solar Panel Mount manufacturer’s footing specification or an engineer’s advice.
Pole mounts allow easy tilt adjustment and lift panels clear of low shade. A single post concentrates wind stress, so footing quality matters.
Balcony brackets
Railing and wall brackets suit plug-in systems. Many countries cap plug-in output at about 800 W AC, so a 1kW DC array may or may not qualify, depending on local rules. Check them before buying.
Quick comparison
| Mount type | Best for | Verdict |
|---|---|---|
| Pitched roof rail mount | Homes with sound roofs | Best default for most buyers |
| Flat roof frame (anchored) | Concrete roofs, shops | Good if waterproofing is handled |
| Ballasted frame | Roofs that cannot be drilled | Only if structure allows extra weight |
| Standing seam clamp | Metal roofs | Fast and hole-free |
| Ground Solar Panel Mount | Land, shaded roofs | Best access and tilt, higher groundwork |
| Pole Solar Panel Mount | Small or remote arrays | Flexible, needs strong footing |
| Balcony bracket | Renters, apartments | Check local plug-in rules first |
Match the mount to your surface
| Surface | Typical attachment | Watch for |
|---|---|---|
| Concrete (RCC) flat roof | Tilted frame, anchored or ballasted | Waterproofing, ballast weight, parapet shade |
| Asphalt shingle | Flashed L-foot or standoff into a rafter | Missing the rafter |
| Tile | Tile hooks under the tiles | Cracked tiles, hook fit |
| Standing seam metal | Seam clamps | Seam profile compatibility |
| Corrugated or tin | Brackets to purlins, sealed | Leaks, galvanic corrosion |
| Open ground | Posts on concrete or ground screws | Soil type, frost, shading |
Materials and corrosion
- Anodized aluminum (such as 6005-T5) is light and corrosion resistant, which makes it the usual rail material.
- Hot-dip galvanized steel is strong and economical for ground frames and flat-roof structures.
- Stainless steel (A2 or A4) is best for fasteners. A4 resists salt air better.
- Painted mild steel is a poor choice near coasts or in damp climates.
One rule matters more than the rest: never fasten carbon steel directly to aluminum rails without isolation washers. Galvanic corrosion will attack the aluminum. Mixed metals on corrugated roofs cause the same problem, showing up as rust streaks where water drips off the panels.
Standards and certifications
Look for documentation rather than marketing claims.
- UL 2703 (North America) covers racking, clamps and bonding. Many plan reviewers and authorities having jurisdiction (AHJs) look for it.
- UL 3741 relates to PV hazard control for systems with rapid shutdown.
- IEC 61215 and IEC 61730 certify the panels and define how they may be clamped.
- ASCE 7 is the US method for wind and snow load calculations.
- Eurocode 1 is the European equivalent.
- BIS standards apply in India, and MCS applies to many UK installations.
UL 2703 has limits. One US county advisory noted that the standard does not cover certain roof attachments, and only fixings into structural members such as rafters had been validated against that county’s design wind loads. A certificate helps, but it does not replace attaching to the right structure.
Wind, snow and weight
Wind uplift usually governs the design. Air moving under an array pulls on clamps and fasteners, and edge and corner rows see higher uplift than the middle. Panels themselves add roughly 10–13 kg/m², plus racking, so older roofs need a structural check.
Modules are commonly tested to withstand around 5,400 Pa downward and 2,400 Pa upward under IEC 61215, and good racking is designed to match that. Your local design wind speed and snow load decide whether a generic kit is enough, so ask the supplier for load ratings and span tables.
Leaving too large a gap behind the panels can let wind get underneath, while too little restricts cooling. Follow the manufacturer’s gap guidance.
What a complete 1kW Solar Panel Mount kit should include
Use this checklist before you pay:
- Rails sized for your module count and orientation
- Roof hooks, standoffs or ground posts matched to your surface
- Mid clamps and end clamps for your panel frame thickness
- Flashing or sealing parts for every roof penetration
- Tilt legs if the array sits on a flat roof or ground
- Stainless bolts, nuts and washers
- Grounding lugs and bonding hardware
- Cable clips to keep wiring off sharp edges
- Written load ratings, installation manual and warranty terms
Kit or separate parts?
A matched kit saves time and removes compatibility guesswork. Separate parts make sense for unusual roofs, local fabrication or tight budgets.
Choose a kit when:
- Your roof is a common type
- You want documentation for permits and insurance
- You are installing for the first time
Choose separate parts when:
- The surface is unusual
- A local fabricator can build to engineered drawings
- You can verify every component’s rating yourself
Frame fit comes first. A cheap kit that cannot grip your Solar Panel Mount frame properly is worthless.
What a 1kW Solar Panel Mount costs
Pricing varies widely by country, material and supplier, so treat these as indicative only.
| Source type | Indicative figure | Note |
|---|---|---|
| US distributor, flush roof mount | about $0.50–1.00 per watt | Roughly $500–1,000 at 1kW |
| US distributor, tilted flat roof | about $0.60–1.20 per watt | Extra frame material |
| US distributor, ground mount | about $0.80–1.50 per watt | Foundations add cost |
| Ground screws | about $80–150 each | Avoids concrete |
| Indian supplier listings, fabricated GI structure | about ₹1,400–1,900 per kW | Marketplace listings, quality varies |
| Single stainless roof bracket | about €6 | One part, not a system |
| Balcony bracket | about €39 | Railing-type, panel width limits apply |
Per-watt pricing is less reliable at 1kW. Flashing, grounding hardware and minimum fabrication costs do not shrink with the array, so price the whole kit or the cost per Solar Panel Mount instead.
Small jobs are also awkward to quote. Many installers set minimum project sizes of around 3–5 kW, which is why 1kW buyers often end up with kits or small local contractors.
How to install a 1kW Solar Panel Mount
Roof work and electrical connections carry real risk. Use a qualified professional where the law requires one or where you lack training.
- Survey the site. Measure the space, check shade and locate rafters, purlins or footing positions.
- Set tilt and direction. A common starting point is a tilt near your latitude, facing true south in the Northern Hemisphere or true north in the Southern. Tilting for your weakest month is another approach.
- Mark the layout with chalk lines and confirm the module orientation.
- Install anchors. Fix hooks or feet into structural members, or set footings and ground screws.
- Seal every penetration with proper flashing, and do not reuse existing roof screws.
- Fit and level the rails.
- Clamp the panels within the approved clamping zones.
- Bond, ground and torque-check all fasteners, then route cables clear of sharp edges.
Common mistakes
- Fixing into roof sheeting instead of rafters or purlins
- Assuming one generic kit suits every wind zone
- Mixing steel fasteners with aluminum rails
- Clamping outside the approved zones, which can affect the Solar Panel Mount warranty
- Skipping the structural check on an old roof
- Using sealant alone instead of flashing
- Ignoring shade from vents, tanks and parapets
- Leaving no safe access for cleaning
A well-flashed mount rarely leaks. In one US survey of 20 homes, no leaks were found at properly flashed Solar Panel Mount points.
Permits, insurance and fire access
Permits depend on location. Many places require approval even for small systems, and structural documentation of the Solar Panel Mount is often part of the application. Tell your insurer, too.
Firefighter access matters as well. Building researchers have noted that Solar Panel Mount can shield a roof from water jets, so leave pathways where local rules ask for them.
Regional notes
| Region | What to focus on |
|---|---|
| India | Flat RCC terraces and tin shed roofs, BIS compliance, local fabricated GI structures, subsidy rules |
| United States | UL 2703, permits, AHJ requirements, flashing into rafters |
| UK and Europe | MCS for incentive schemes, Eurocode loads, tile hooks, balcony brackets |
| Germany | Balcony power plant brackets and railing mounts |
| South Africa | Corrugated roofs, extra roof load of roughly 15–18 kg/m² |
| Australia | Cyclone-rated fixings, metal-roof leak prevention |
Rules, incentives and plug-in limits change often, so confirm them with your local authority before buying.
Maintenance
Check fasteners after the first few weeks and after major storms. Look for loose clamps, rust streaks, cracked sealant and debris trapped around brackets. Clean panels as dust or bird droppings require, and photograph the installation for warranty and insurance records.
FAQs
How many Solar Panel Mount make a 1kW system?
Two to four modules in most cases. Two 500 W panels give exactly 1.0 kW, three 335–400 W panels give about 1.0–1.2 kW, and smaller 100–200 W panels need five to ten.
How much roof space does 1kW of solar need?
Panel area alone is roughly 5–6 m² (55–65 sq ft) for three 400 W modules. With spacing, edge setbacks and access, plan on about 7–9 m² (75–100 sq ft).
Is a roof mount or ground mount better for 1kW?
Roof mounts usually cost less and save land. Ground mounts suit shaded or weak roofs, easier cleaning and a freely chosen tilt, but need space and groundwork.
Do I need a UL 2703 certified mount?
In North America, inspectors and AHJs commonly look for it. Elsewhere, ask for equivalent load-test documentation and local compliance such as BIS or MCS. Certification does not replace correct attachment into structural members.
Can I install a 1kW solar mount myself?
Small ground, pole and balcony mounts are often DIY-friendly. Roof anchoring, structural judgment and electrical connection are better left to qualified people, and some places require it by law.
What is the best material for solar panel mounts?
Anodized aluminum for rails, hot-dip galvanized steel for heavy frames and stainless steel (A4 near coasts) for fasteners. Avoid direct steel-to-aluminum contact.
How much does a 1kW solar mount cost?
Typically a few hundred to around a thousand dollars in US distributor pricing, and less for locally fabricated structures in markets such as India. Prices vary, so compare complete kits rather than single parts.
Can a 1kW system go on a balcony?
Sometimes. Many countries limit plug-in systems to about 800 W AC, and railing strength, landlord or HOA rules and local regulations all apply. Check these before buying.
How do I prevent roof leaks from solar mounts?
Fix into rafters or purlins, use proper flashing at every penetration, avoid reusing old screws and have the work inspected.
Conclusion
A 1kW array needs a mount that is simple, certified and matched to your surface. Roof rails suit most homes, flat roofs need extra care with waterproofing and weight, and ground or pole mounts work well where space is available.
Your next steps:
- Confirm panel wattage, size and frame thickness.
- Measure your space and check for shade.
- Look up your local wind, snow and permit rules.
- Choose the mount type and materials for your climate.
- Compare complete kits using the checklist above.
- Verify certification, load ratings and warranty.
- Install safely, or hire a qualified installer.
- Inspect after storms and once a year.
Unfulfilled Points: Original photos or diagrams and a named engineer or installer reviewer byline cannot be produced in text. Region-specific prices, subsidies and plug-in solar rules are kept general because they change often and could not be verified.
These information about solar panel mounting are gathered from different surveys, medical tests and tech giants like Tom’s Guide and more. Our top priority is to provide you valuable information.
For More Details About Different Solar Panels Click Here